# Payments
# Recent
View recent transactions, payment schedules, file uploads and group tasks on robust datatables.
To view the payments transaction history:
- Log into your PesaWay account
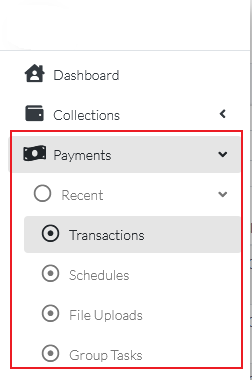
- On the Left Sidebar, click on Payment
- On the drop down menu, click on Recent
TIP
Change the number of transactions displayed on one page using the Per Page dropdown
# Transactions
View payments transactions that have been processed.
TIP
Filter / search payments transactions using phone number, status, reference, receipt or amount
# Schedules
View scheduled payments transactions to individuals, groups and file uploads.
TIP
Filter / search schedules using schedule type, title, group name, phone number, frequency, status, reference or amount
# File Uploads
View file uploads and download the files to view the contents
TIP
Filter / search file uploads using title or status
# Group Tasks
View group tasks and their processing status.
TIP
Filter / search group tasks using group name, amount, status
# Send Payments - Business to Customer (B2C)
For simplicity, sending payments has been centralized to one page whether sending to a single number, group of contacts in the system or multiple people in an excel file.
DANGER
This process is only available to the Web User.
To send payments:
- Log into your PesaWay account
- On the Left Sidebar, click on Payment
- On the drop down menu, click on Send

# Send Payment to a New Number
- While on Payments > Send page, click on the Payment Method drop down
- For B2C, select MPESA
- Click on Send To options field
- Select New Number
- Fill in Phone Number. The phone number should start with
254or07 - Fill in Amount
- Input the Reason e.g. Salary Payment
- Click on Submit
- Click on Send Now or Schedule to send at a future date 🎉
# Send To an Existing Contact
- While on Payments > Send page, click on the Payment Method drop down
- For B2C, select MPESA
- Click on Send To options field
- Select Existing Contact
- Select the contact on the Existing Contact field
- Fill in Amount
- Input the Reason e.g. Salary Payment
- Click on Submit
- Click on Send Now or Schedule to send at a future date 🎉
# Send To a Group
Note: Every contact in the group will be sent the same amount.
- While on Payments > Send page, click on the Payment Method drop down
- For B2C, select MPESA
- Click on Send To options field
- Select Group
- Fill in Amount. If you would like to send different amounts per contact, consider uploading a file.
- Input the Reason e.g. Salary Payment
- Click on Submit
- Click on Send Now to send now or Schedule to send at a future date 🎉
# Upload File
- While on Payments > Send page, click on the Payment Method drop down
- For B2C, select MPESA
- Click on Send To options field
- Select Upload File
- Click on Download Template. You should get a popup to save the template.
TIP
If you don't get a popup to save the file, please check your Downloads for the file. If no file was downloaded, check if your browser blocked popups from the site.
- Open the saved file and populate the contents, following the example given. Ensure the phone number starts with
'254 - Save the changes
- Upload the file either by dragging and dropping it on the Upload File section OR by clicking on the section to select the file.
- Input the Title
- Click on Submit
- Click on Send Now or Schedule to send at a future date 🎉
NOTE: Once a payment has been submitted. A manager user has to approve before it is disbursed.
# Approve Payment
For simplicity, approving payments has been centralized to one page whether its for one transaction or bulk.
DANGER
This process is only available to the Manager.
To approve payment transactions:
- Log into your PesaWay account
- On the Left Sidebar, click on Payment
- On the drop down menu, click on Approve

- On the Approve Payment page, click on either Approve / Reject button.
DANGER
This process cannot be reversed. Make sure you verify all the necessary details before Approving
← Collections Billing →